")
")
 |
KISS (Keep It Simply Stupid) principle for the realization and parameter setting of this Winkey CW keyer using an Arduino Nano and the Keyer software by K3NG. |
Description
This keyer being intended to be used mainly in conjunction with contest softwares, I decided to make it with the minimum of necessary functions:
- no speed adjustment by potentiometer
- no memories
- no monitor
- no display
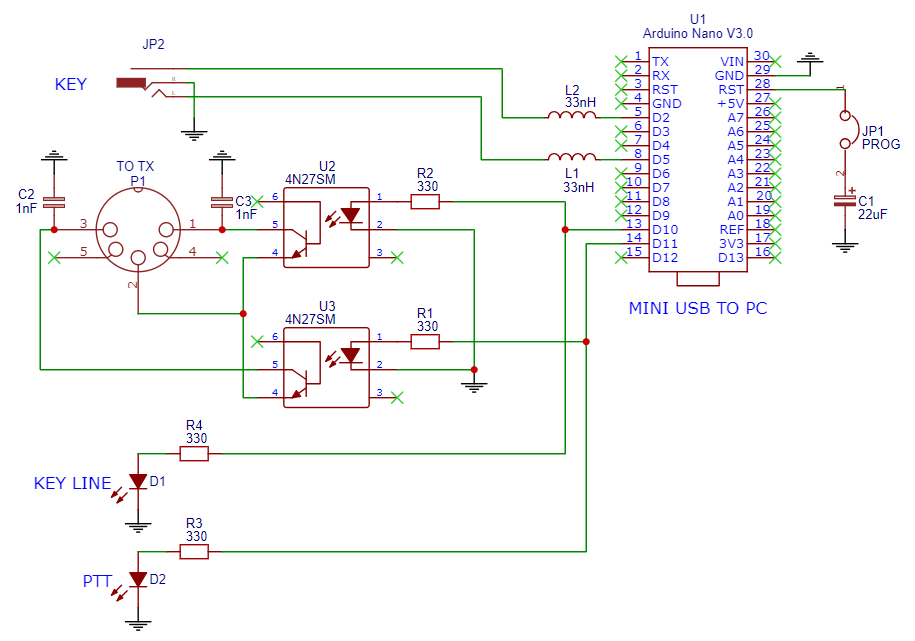
Diagram
Arduino programming
K3NG's KEYER software is downloaded from the author's Gihub site and modfied/compiled with Arduino's IDE software.
We modify the following configuration files by leaving uncommented only the following lines.
During programming, the PROG jumper must be removed in order to allow access to the USB port.
We compile, then program the Arduino.
Fichier Nano keyer_hardware.h
#define HARDWARE_NANOKEYER_REV_D
Fichier keyer_pin_settings_nanokeyer_rev_d.h
#define paddle_left 2
#define paddle_right 5
#define tx_key_line_1 10
#define ptt_tx_1 11
Fichier keyer_features_and_options.h
#define FEATURE_WINKEY_EMULATION
#define OPTION_INCLUDE_PTT_TAIL_FOR_MANUAL_SENDING
#define OPTION_EXCLUDE_PTT_HANG_TIME_FOR_MANUAL_SENDING
#define OPTION_WINKEY_STRICT_HOST_OPEN
#define OPTION_WINKEY_2_SUPPORT
#define OPTION_WINKEY_2_HOST_CLOSE_NO_SERIAL_PORT_RESET
#define OPTION_WINKEY_IGNORE_LOWERCASE
#define OPTION_DIT_PADDLE_NO_SEND_ON_MEM_RPT
#define OPTION_DO_NOT_SEND_UNKNOWN_CHAR_QUESTION
#define OPTION_EXCLUDE_EXTENDED_CLI_COMMANDS
#define OPTION_WINKEY_PROSIGN_COMPATIBILITY
Fichier keyer_settings_nanokeyer_rev_d.h
Everything related to fine-tuning of the keyer options (initial speed, dit/dah ratio, etc...)
Before using our contest or logging software, we can check the proper functioning of the whole using the WKdemo software (for version 1 and 2) of K1EL.
The default communication parameters with the Winkeyer are 1200 baud, 8, N, 2 DTR and RTS Handshake.
Building
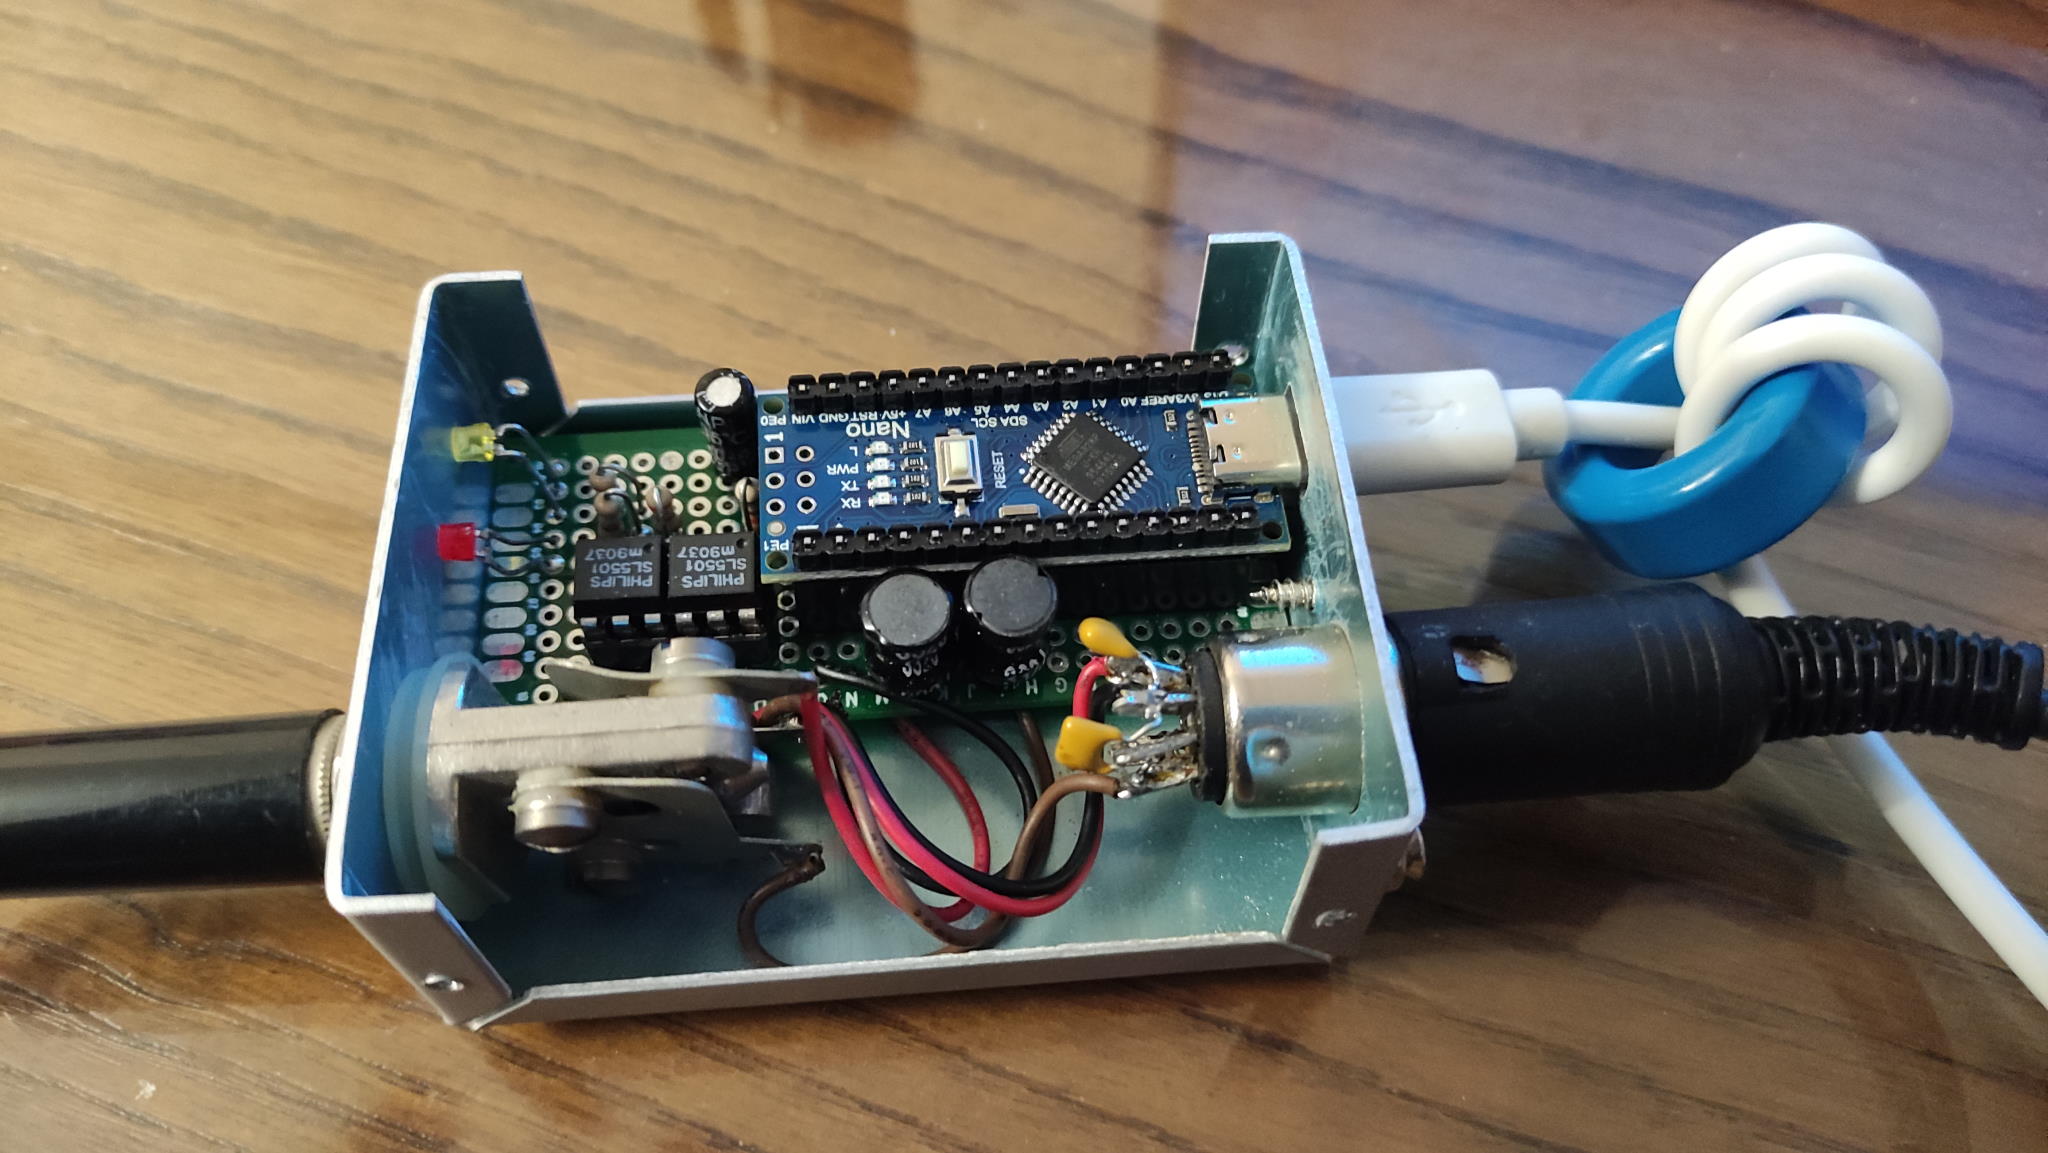
For a quick building, I used a solder test board.
The Arduino Nano is installed on pin headers which are soldered on the test board, just like the other components.
The PTT and CW outputs are wired on a 5-pin DIN connector and the keyer is provided on a 6.3 mm diameter stereo JACK plug. For safety, I added some capacitors and HF filter chokes.
A ferrite core on which the USB cable is wound eliminates RF signals that could disrupt proper operation.
2 LEDs are displaying the state of the transceiver PTT and CW outputs.
The wired test board is installed in a TEKO model A2 box 58 x 72 x 28 mm.
The whole gives a very contact assembly and is powered by the USB port of the computer.
Usage
In use, the PROG jumper must be in place. It prevents a reset of the Arduino in use.
Communication with the host computer is by default at: 1200 baud, 8, N, 2 DTR and RTS Handshake.
All the settings (speed, dot/line ratio, delays, etc.) are made in the new software.
Liens
K3NG Web page
Github page with the last version
K1EL download page - WKdemo and documentations